Hello, Baking Enthusiasts!
Welcome to “Yara’s Oven Delights,” your go-to destination for delightful recipes and baking inspiration. I’m Yara, and I’m thrilled to have you here as we embark on a sweet culinary journey together.
I’ve always believed that the kitchen is the heart of the home, and my love affair with baking and cooking began as a child, watching my grandmother create magic with simple ingredients. From that moment, I knew I wanted to share the joy of homemade treats and scrumptious meals with the world.
Why “Pinch of Yum”?
You might wonder why I chose the name “Yara’s Oven Delights.” Well, it perfectly captures my philosophy of cooking. It’s that extra sprinkle of love, the secret ingredient that turns a dish from ordinary to extraordinary. Here, I’ll share my favorite recipes, tips, and tricks, all designed to add that “yum” factor to your culinary creations.
What You’ll Find Here:
In this cozy corner of the internet, you can expect a delightful mix of baking recipes, from classic chocolate chip cookies to artisan bread, and cooking creations that span the globe. We’ll explore techniques, troubleshoot kitchen conundrums, and celebrate the joy of sharing meals with loved ones.
Join the Pinch of Yum Baking Community:
I believe that food has the power to connect us, and I’m excited to connect with fellow food enthusiasts like you. Let’s chat, share our kitchen triumphs (and occasional mishaps), and celebrate the magic of homemade goodness together.
So, grab your apron, preheat your oven, and let’s create something delicious! Thanks for stopping by, and I can’t wait to be a part of your culinary adventures.

Happy baking!

Festive Delight: Christmas Tree Cake Recipe

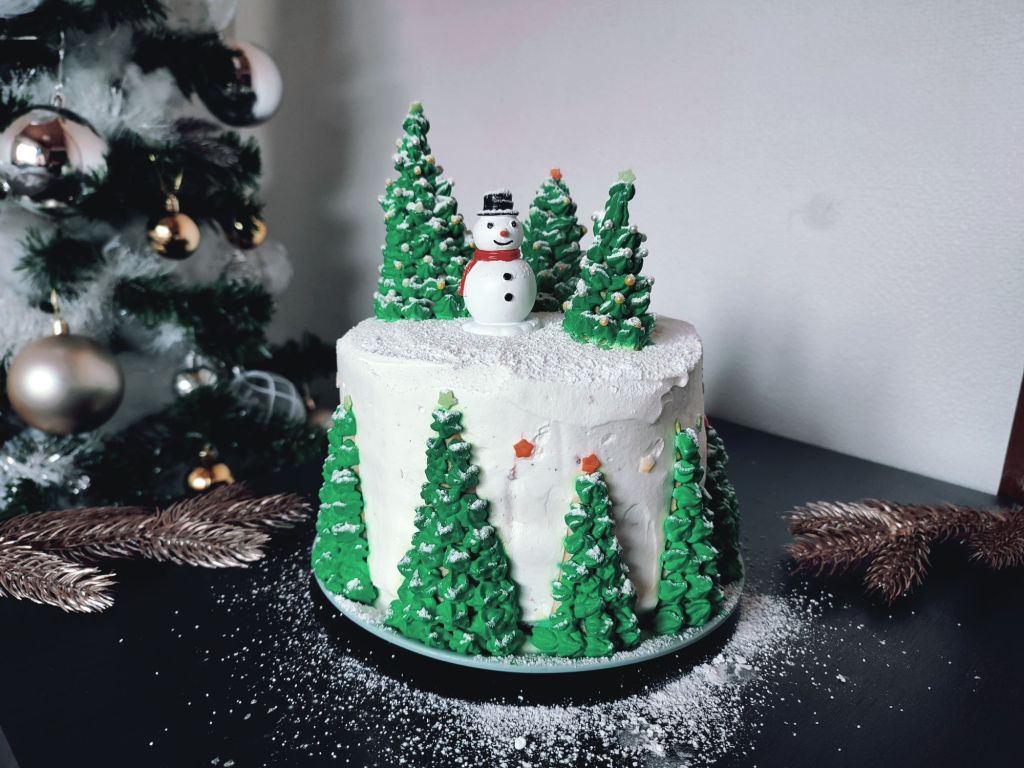
This is the season for a delightful Christmas tree cake that will not only satisfy your sweet tooth but also add a festive touch to your holiday celebrations. Here’s a simple and scrumptious recipe for you.

Ingredients:
2 large eggs
60g sugar
60g flour
1 tablespoon (15g) milk
10g butter
Tea-time Decorations:
Whipped cream
Green food coloring
Ice cream cones
Instructions:
Set your oven to 350°F (180°C) and grease a cake pan.
In a mixing bowl, beat the eggs and sugar until light and fluffy.
Gradually add the sifted flour, mixing well after each addition.
Melt the butter and add it to the batter along with the milk. Mix until smooth.
Pour the batter into the prepared pan.
Bake for 20-25 minutes or until a toothpick inserted into the center comes out clean.
Allow the cake to cool completely before decorate.
Whip the cream until stiff peaks form.
Smooth out the cream on your cake using a bench scraper. Grab an angled cake spatula to smooth out the top and edges.
Cut the ice cream cones with a sharp serrated knife, opting for shorter ones for the top and various halved cones for the sides. If needed, dip the cones in water briefly to ease the cutting process.
Affix the halved cones to the cake’s side, creating a visually engaging arrangement by staggering tall and short ones.
Pipe star-shaped dollops onto the cone’s surface, starting from the bottom and working your way up.
For the cones atop the cake, pipe the dollops before placing them. Save the “tippy top dollop” for after they are positioned on the cake. Once frosted, arrange the trees on the cake’s top and add the final dollop at the cone’s peak.

To complete, sift confectioners’ sugar over the cake’s top and the trees. Your masterpiece is now ready to be served! 🍰✨
Happy baking! 🎄✨

Christmas Tree Cake 🎄

Leave a comment

Design a site like this with WordPress.com
Get started